Saturday, December 14, 2013

Holy cow I hadn't realized how long it had been since I've updated! Well the IronMan 4x4 front bumper and 10K winch has been installed and wiring almost finished up. Pretty happy how it came out and the install was pretty straight forward. I also lined the rig in Al's liner this past July and now that the test areas about how the liner would take John Deer Blitz black I'm just waiting for warmer weather to shoot it.

A couple weeks ago I was out at the barn and a guy who rented space for his trailer who hadn't paid in months finally came to pick it up.  When I pulled in he was running about 40' of straps to his conversion van to the trailer tounge and was about to attempt to pull it 90 degrees thru a gate. Knowing that this wouldn't work I immediate offered to tow it up to solid ground, my mistake for being a nice guy.

He was supposed to be spotting me in the tall grass and obviously wasn't paying attention or didn't care, guessing the latter, as he failed to point out some fence wire that had got caught on the rear part of the exhaust. As I continued backwards the tire caught the wire and proceeded to bend the bosal down and pinch it right at the top of the rear diff......AAAAAAAAAAAAAAAAAAAARG!

So after getting it out for him I offered to fire up my compressor and air up a flat tire on each side and top off the ones that looked like they had air, only to have him chide my old beast of a compressor.
Not even an appreciated thank-you as he left or offer to help me sawzall the muffler off at the pinch, what a douchebag.

Anyhow I had bought the rear most part a while back off another Ih8mud member so I thought in an easy job to do but after further investigation realized it wouldn't be so easy. I needed a gasket and three new mounts, off to Beno to order. The job should have been fairly straight forward, replace rear part and install new gasket and mounts, or so it would seem.

After I got the rest of the old rear off I noticed that the old gasket had not come all the way out, this lead to several hours with small drifts and chisels to clean out the recess in which the new gasket sat.
With that done I started to see how everything was going to line up with the new mounts, it was about an inch off before the main muffler, 2 inches past the main, and nearly 3 at the bosal rear mount.
Several more hours after jacking and bending it was close enough to line back up properly.

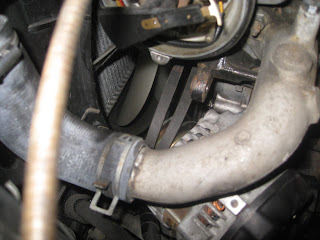
The next morning my alternator started the "I'm dying replace me soon" by flashing the low volts light on the dash several times on a cold start before going away but over the week the length of time it would stay one just got longer.

Pricing out a cheap chinacom alternator was around $150, not my first choice, a factory was north of $400, not really a second choice, so back to Ih8mud.com to search the forums. Found Photoman Bill had been making a kit that allowed a 03-07 Sequoia alternator to be used for $90, found used factory alternator off ebay for $80, new brush kit from Beno $20, parts ordered.

Now why would you do that you ask? Well the stock alternator on the 80's are underpowered IMHO, the Sequoia puts out nearly double the power, 150 amps worth to be exact. With the dual batteries, winch, 2000+ watts of amps it just made sense to go this way seeing that it was a Denso and not a chinacom refurb and at nearly the same cost.

That install was actually straight forward, Bill's instructions were flawless and the entire thing from beginning to end was about 3 hours.

Here are some pictures in prep for the liner, removing the fender flares.


The grinder and pads worked like a champ


 Once the surface was roughed up enough it was time to shoot it with some etching primer


Roof rack hole solution simple, plastic plugs and rtv


 Bumper finally installed the day after I lined it


 I did some test areas with JD Blitz black and after 6 months it's holding well so I'm going to shoot the entire rig as soon as I get a warm day.

Bills Kit
 Pick of main bracket installed
 Have to wiggle the belts on if you're using the stock LC pulley

 Old brushes from the stock on left to the Sequoia on the right.

I hope to have an IPOR rear bumper by end of January and will then begin the OME springs and be ready for 285's. Currently working on the rear door system and trying to button of the rear interior.

Tuesday, May 7, 2013

OK so it's been a long while since I posted but I've done a ton or work since the last update. The new leather kit from metrictlc.com is in and I must say Shane's stuff is incredible I opted to do the seat heaters as well and use some LS400 switches in Oak for that factory look. The interior is 90% complete, only waiting on time to finish the rear Hardigg case pullout drawer before snapping it back together.

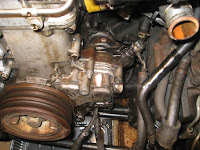
After my last post about replacing the water pump/thermostat my radiator decided to split at the top so that whole mess was rather quite invovled. Since the radiator was to be pulled it was time to do the distibutor o-ring/ the oil pump cover o-ring and the front main oil seal and I must tell you it's a hellova job but since I was going to have the room and the parts were cheap it was time to just do it.

I opted for a $100 aluminum radiator from Sheppard Auto, its for a 91-94 and takes a slight bit of modding but fits and works and MUCH cheaper than any other alternative I found.
The top mounts took some flat bar to adapt to the stock shroud because I didn't feel like taking the risk of cutting or welding into a new radiator. 

What chapped my ass was the fact I had done the water pump earlier and afterwards did the dual battery install, now all that work had to be undone for the most part to complete this job.

Turkey pans at the dollar store 2 for a buck!
Time to drain start removal and degrease. A bad o-ring and oil pump cover gasket can make some serious grime.

I spent hours degreasing, scraping, brushing, the amount grime was unreal as you can tell by the pictures below. It's a dirty and nasty job without the aid of a pressure washer or steamer but you gotta do it while you're in there and before you can start to break anything apart.


Picture on the left you can see where oil seeps, on the right with distrib removed you can really see the oil trail. Belopw is the disributor cleaned and shows how bad the old ring was, literally I had to crack it off it was no longer plyable and felt like hard plastic.


Once I started stage one of the clean up things progressed pretty well, 3 cans of degreaser were used the pans came in handy to catch most of the crud and grimey water and sawdust absorbed everything else.
 Shot of the underside, literally caked on oil crud. Went thru I don't know how many nylon brushes during this nasty process but well worth getting it done now, I guess!


Ok so here we are before crank pulley removal, things are looking much better than they started hours ago, or that's what I thought until the pulley came off. To the right is a picture of the jig I made to get the crank pulley off, if you're in need drop me a line and I'll let you borrow it, very handy!
 
Jig in place.


I could have done the "bump" method but that doesn't allow me to get it back on and I'm leary of bumping alone. Suffice to say that crank bolt is ON THERE tight, it has to be since the oil pump is friction driven, if it aint tight oil aint flowing and then you have some serious problems!


With the crank pulley out it was time to do some more cleaning and pull the main seal and the oil pump cover on the left. I heard nightmares on IH8MUD.COM about the cover screws stripping, breaking and all kinds of ways to get them out, mine came out without issue it was the main seal that gave me a fit. I opted to replace the pump cover screws with torx from a forum member. 

So during the lower seal replacements I didn't get photos, I was totally engrossed in the work and focused on getting it done. Since I was this deep into the project I opted to removed the PHH and go 100% silicone hoses. I removed the hard pipe that runs behind the motor to where you find that pesky heater hose and used an entire run of hose to replace. This time I also opted to replace ALL radiator hoses too, found Gates at Car Quest for under $25 and the hose came off ebay, 10' for $30 delivered and it is some THICK stuff, my mind rests easy now that this is done.

Flushing the system was more of a hassle than I ever imagined it would be to get a somewhat clear flush, I ended up hooking up a hose and pushing water thru the upper radiator pipe and then thru the firewall and again thru the PHH, what a PAIN IN THE A$$ it was. Finally I was ready to contemplate the radiator install!! Overall this process was pretty straight forwared, rather than tapping a hole for the head pressure relief hose I opted to buy a 45degree 1.5" copper elbow at home depot, tap and JB weld that and then splice it into the top hose as seen below. To reinstall the crank pulley I used the jig again and bought a 3/4" torque wrench and socket set from Harbor Freight for $60

So far 5K miles without an issue, I'll update soon when I find my other camera with the after pictures, in the mean time you can find the entire album, or the bulk of it here

Since this job I've added Pfrans LED's, drained the Tcase and both diffs and went synthetic, Depot headlights with clear turns and parking and wired for the disco mod with LED's in the parking lights so they blink orange when the turns are on but glow white otherwise. Still laying in the garage is a Ironman 4x4 with an Engo 10K winch, I hope to line in the next few weeks and install those.