Wednesday, December 9, 2015


Filling in the blanks here where I was too lazy to post after a project. Rear drawer system done!
 Frame is 3/4" square tube topped with 3/4" birch ply wood, drawers made of birch as well.
 These suckers can hold a TON of crap!
 Drawer faces are 10 gauge steel recovered from an old file safe, the handles were from Zoro and welded into the face
 Top is covered with what is called a "roof mat" usually when AC units are set on roofs of commercial buildings this is what they use cheap and tough as nails
 Wings on each side for more junk storage
 Thinking about redoing the design on the next set
A short video of the system

Long time more progress

Keeping up with a blog on a timely basis or as things progress as they happen isn't exactly my bag of tea. When I get into a project I usually just want it done and forget to snap pics along the way, it is what it is.


Since the last post I've installed the rear IPOR bumper, rebuilt the power steering pump, removed the old cooler and installed new aluminum behind the front cross member. I also installed the OPOR sliders and the IPOR skid plate and finished the rear swingouts. I bought some new General Grabber AT2 in a 315/75/16 which I absolutely love. I also removed the LSPV as it  was leaking, the cost vs. benefit of replacing told me to just run without it. I bought a Lokka Spool and completed the part time kit as well.


On the burner now is the can holder for the DS swingout but who knows when that will happen!


Friday, July 11, 2014

VC removal and front axle rebuild

One of my least favorite jobs on the Land Cruiser, the front axle rebuild. When those at IH8MUD.com say make sure you have disposable gloves and a case of paper towels, take the seriously! The amount of sludge, grease, and birf soup (caused by diff oil leaking into the knuckle) was to say the least, enormous!
This was the first round of rags, the 99 cent turkey pans from the dollar store were worth their weight in gold for this project and the spare pickle buckets were also a godsend.
First was to remove as much grease with paper towels as possible as show below.  
 
After the initial wipe down I used the square bucket as a "parts washer" and filled over the part with kerosene, put the lid on and manually "swished" for a few minutes and then let sit.
 
After wiping down the parts and getting most of the grease off I used a spray bottle to soak them down a bit and then took them to the "box" where I used a cupped wire brush on a drill to start knocking off the heavy stuff. This kept the grease and road grim from being thrown everywhere.
Below is a spindle and knuckle before and after the wheel.


After getting them cleaned up it was back to the kerosene station for another bath and wipe down.
After the rags were coming up somewhat "clean it was off to be blasted with brake cleaner
This really exposed where the grime still was and even though I thought I had been fairly thorough each part had to make its way back to the wire wheel box for a second time and then wiped down with kerosene and back to brake cleaner.

Once satisfied with them they went to be taped up for painting. I wasn't initially going to paint these but I was now so deep into the job it seemed senseless to reassemble without giving them a fresh coat of flat satin black. Opted to prime them first with etching primer before the top coat.


And since I had everything apart I decided to do these as well, OME castor correction bushings.
Two of the old ones came out fine, the other arm fought me tooth and nail and eventually needed to be chiseled out. Going in I nearly mushroomed one but was able to save it.
 
The knuckle itself on the drivers side had noticeable surface rust, this was addressed again with a wire wheel and some emery cloth.


This coming weekend should be time enough to put this project to bed although I am contemplating doing  power steering pump rebuild since there is more room to maneuver around now and with any luck I'll finally get those OPOR sliders mounted!


Thursday, June 12, 2014

More time, more stuff!

Again more time passed and more done on the Land Cruiser but not a lot of time to do some documentation. Since the last post I've installed an IPOR rear bumper, OME heavy springs on the front and back, and installed a custom made drawer system in the back.

On deck is an IPOR skid plate, a set of OPOR sliders, and to finally get the thing in a full coat of JD Blitz black paint, but I digress so here is some shots of the rear drawer system.
They came out better than I had expected but more work than I had planned on

25" of extension

They also close the rear hatch should you want it down

Plenty of room too

The side wings are piano hinged

A good place to keep quick grab stuff like rain coat, oil, etc


I then made some custom mounts to hold these mini extinguishers to the D pillar where the seat belts used to anchor.

I also used some quick fist mounts to do an axe and shovel where the third row grabs used to be


A quick video, sorry about the lighting!
 
This project was more involved than I thought it would be, thinking it would be a weekend project it turned out into a several weekend project but I am happy with the results.
 
So now some shots of the OME heavy's I put on along with the IPOR rear bumper. I ended up gaining about 2.5" of lift which will be nice for some 33" tires down the road.

Might have to put some spacers up front to get it to sit a bit more level

Good shot of the heavy spindles on the IPOR. I will be building the swing outs later this year.

Overall I'm pretty happy with the way it's coming together.
Here are some shots of the OPOR sliders after removing from the pallet


And here they are after a couple coats of JD Blitz black

Hope to get these on shortly, weather permitting I'm painting the truck on June 14th and installing the skidplate and these the following day.


Saturday, December 14, 2013

Holy cow I hadn't realized how long it had been since I've updated! Well the IronMan 4x4 front bumper and 10K winch has been installed and wiring almost finished up. Pretty happy how it came out and the install was pretty straight forward. I also lined the rig in Al's liner this past July and now that the test areas about how the liner would take John Deer Blitz black I'm just waiting for warmer weather to shoot it.

A couple weeks ago I was out at the barn and a guy who rented space for his trailer who hadn't paid in months finally came to pick it up.  When I pulled in he was running about 40' of straps to his conversion van to the trailer tounge and was about to attempt to pull it 90 degrees thru a gate. Knowing that this wouldn't work I immediate offered to tow it up to solid ground, my mistake for being a nice guy.

He was supposed to be spotting me in the tall grass and obviously wasn't paying attention or didn't care, guessing the latter, as he failed to point out some fence wire that had got caught on the rear part of the exhaust. As I continued backwards the tire caught the wire and proceeded to bend the bosal down and pinch it right at the top of the rear diff......AAAAAAAAAAAAAAAAAAAARG!

So after getting it out for him I offered to fire up my compressor and air up a flat tire on each side and top off the ones that looked like they had air, only to have him chide my old beast of a compressor.
Not even an appreciated thank-you as he left or offer to help me sawzall the muffler off at the pinch, what a douchebag.

Anyhow I had bought the rear most part a while back off another Ih8mud member so I thought in an easy job to do but after further investigation realized it wouldn't be so easy. I needed a gasket and three new mounts, off to Beno to order. The job should have been fairly straight forward, replace rear part and install new gasket and mounts, or so it would seem.

After I got the rest of the old rear off I noticed that the old gasket had not come all the way out, this lead to several hours with small drifts and chisels to clean out the recess in which the new gasket sat.
With that done I started to see how everything was going to line up with the new mounts, it was about an inch off before the main muffler, 2 inches past the main, and nearly 3 at the bosal rear mount.
Several more hours after jacking and bending it was close enough to line back up properly.

The next morning my alternator started the "I'm dying replace me soon" by flashing the low volts light on the dash several times on a cold start before going away but over the week the length of time it would stay one just got longer.

Pricing out a cheap chinacom alternator was around $150, not my first choice, a factory was north of $400, not really a second choice, so back to Ih8mud.com to search the forums. Found Photoman Bill had been making a kit that allowed a 03-07 Sequoia alternator to be used for $90, found used factory alternator off ebay for $80, new brush kit from Beno $20, parts ordered.

Now why would you do that you ask? Well the stock alternator on the 80's are underpowered IMHO, the Sequoia puts out nearly double the power, 150 amps worth to be exact. With the dual batteries, winch, 2000+ watts of amps it just made sense to go this way seeing that it was a Denso and not a chinacom refurb and at nearly the same cost.

That install was actually straight forward, Bill's instructions were flawless and the entire thing from beginning to end was about 3 hours.

Here are some pictures in prep for the liner, removing the fender flares.


The grinder and pads worked like a champ


 Once the surface was roughed up enough it was time to shoot it with some etching primer


Roof rack hole solution simple, plastic plugs and rtv


 Bumper finally installed the day after I lined it


 I did some test areas with JD Blitz black and after 6 months it's holding well so I'm going to shoot the entire rig as soon as I get a warm day.

Bills Kit
 Pick of main bracket installed
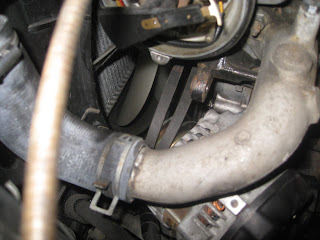
 Have to wiggle the belts on if you're using the stock LC pulley

 Old brushes from the stock on left to the Sequoia on the right.

I hope to have an IPOR rear bumper by end of January and will then begin the OME springs and be ready for 285's. Currently working on the rear door system and trying to button of the rear interior.